No products in the cart.
10 basic steps to create your dream garden
Ready to embark on the exciting journey of creating your dream garden but feeling a bit lost? No worries, we’ve got you covered! In this handy guide, we’ll walk you through garden guru Chris’ 10 simple steps to help you transform your outdoor space into a stunning oasis. From assessing what you’ve got, to planning your plant palette, Chris has taken 40 years of garden design experience right here in Melbourne and boiled it down to the key tips and tricks you need to know. So, let’s dive in and turn your garden confusion into gardening success!
10 Basic Steps to Create Your Dream Garden (when you have no idea where to start)
- Check Out What You’ve Got (The Good, the Not So Bad and the Ugly)
- Let Your House Do the Talking
- Understand Your Location and Conditions
- Get to Know Your ‘Hood
- Dream It, Plan It, and Prioritize It
- Define Your Garden Style
- Create a Plant Palette That Rocks
- Plan the Ultimate Plant Placement
- Get Down and Dirty with the Prep
- Planting 101—You’ve Got This!
- Bonus step: To Irrigate or Not to Irrigate?
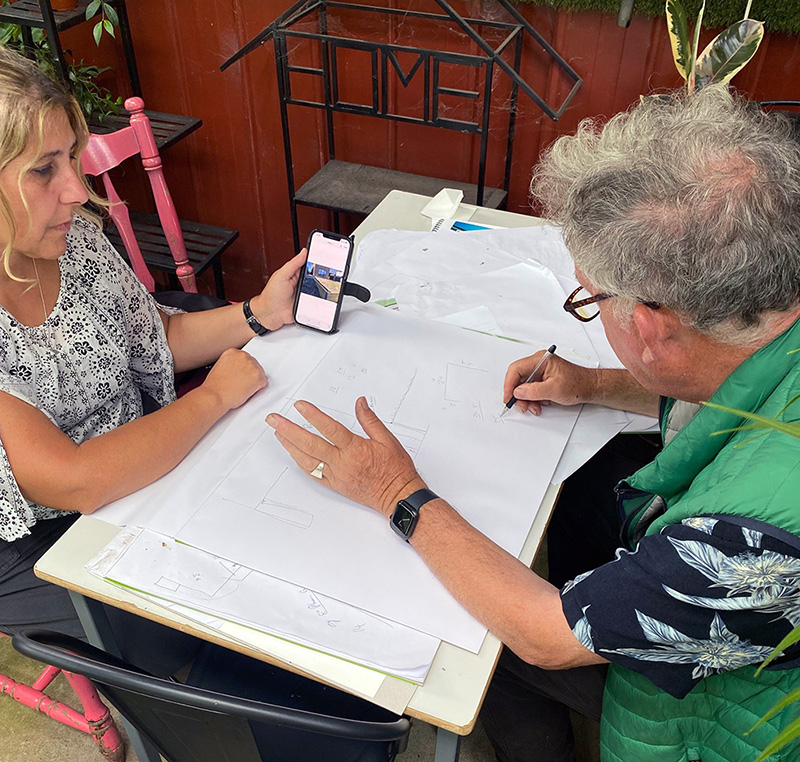
Already overwhelmed thinking about all this, or just want some professional advice on your existing plans (or lack of them)? Give our free Garden Design Service a try.
It’s a one-on-one consultation in our Campbellfield nursery (or by a video chat) to discuss your requirements, plants you like, and go over photos and plans of the site. Together you will work out the perfect design based on your preferences, budget, growing conditions in your area and more. You’ll come up with the exact list of plants you need, and a basic action plan of what you need to do to make it all happen. Very handy for any size garden project.
1. Check out what you’ve got (the Good, the Not So Bad & the Ugly)
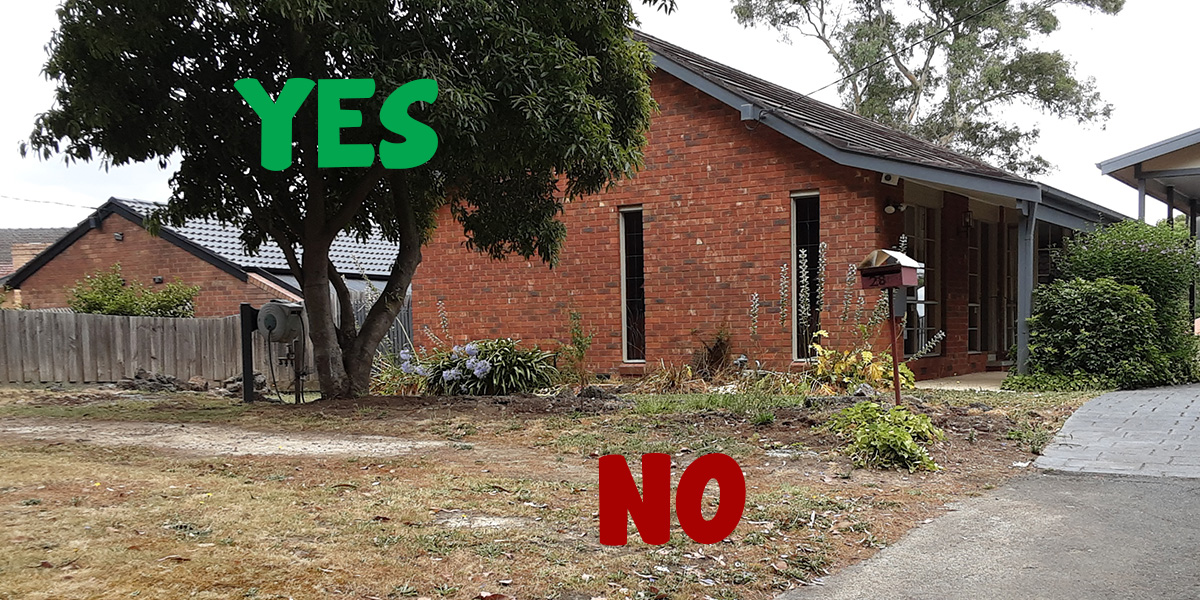
Take a good look at your garden and make a list of the stuff you love and want to keep. Got some gorgeous trees or cool features? Highlight those babies! Now, on the flip side, identify the things that ain’t so great and need to go. But hey, even if it’s not perfect, some elements might have a solid foundation to work with and fix up. An overgrown tree might just need some well-done pruning to turn it into a keeper.
Back to list: 10 Steps to Create Your Dream Garden
Step 2: Let Your House Do the Talking
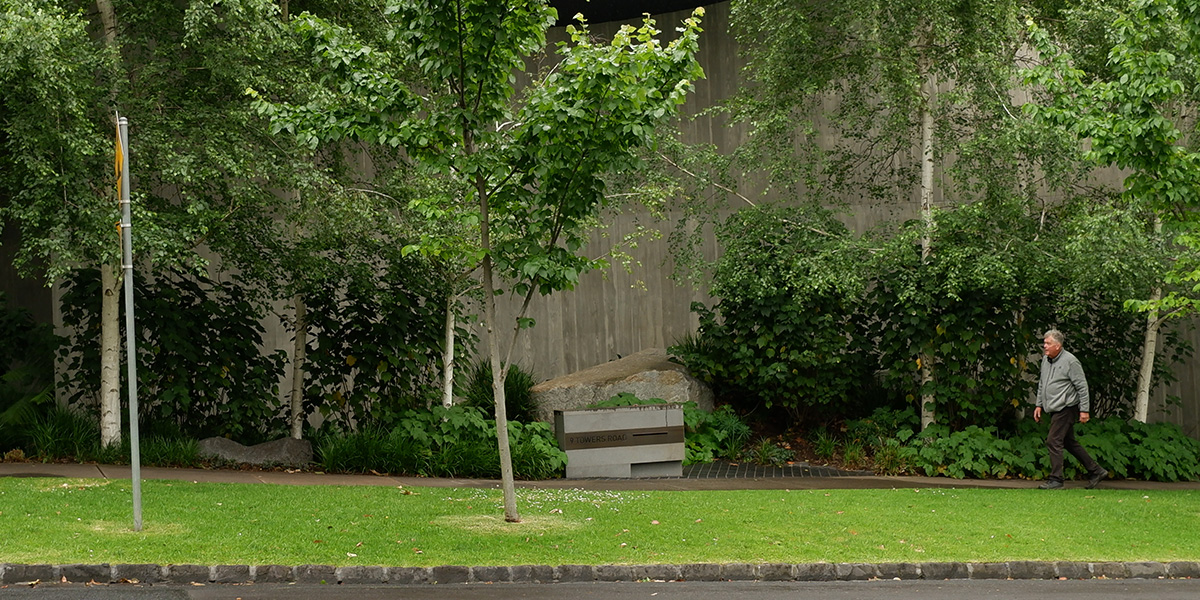
Believe it or not, your house has a say in this garden game too! Take cues from its style and personality. Is it all sleek and modern? Then you’ll want a garden that matches that vibe. Let your house speak up and guide you in creating a garden that complements its coolness. Harmonizing your house and garden creates a cohesive and visually appealing outdoor space.
Back to list: 10 Steps to Create Your Dream Garden
Step 3: Understand Your Location and Conditions
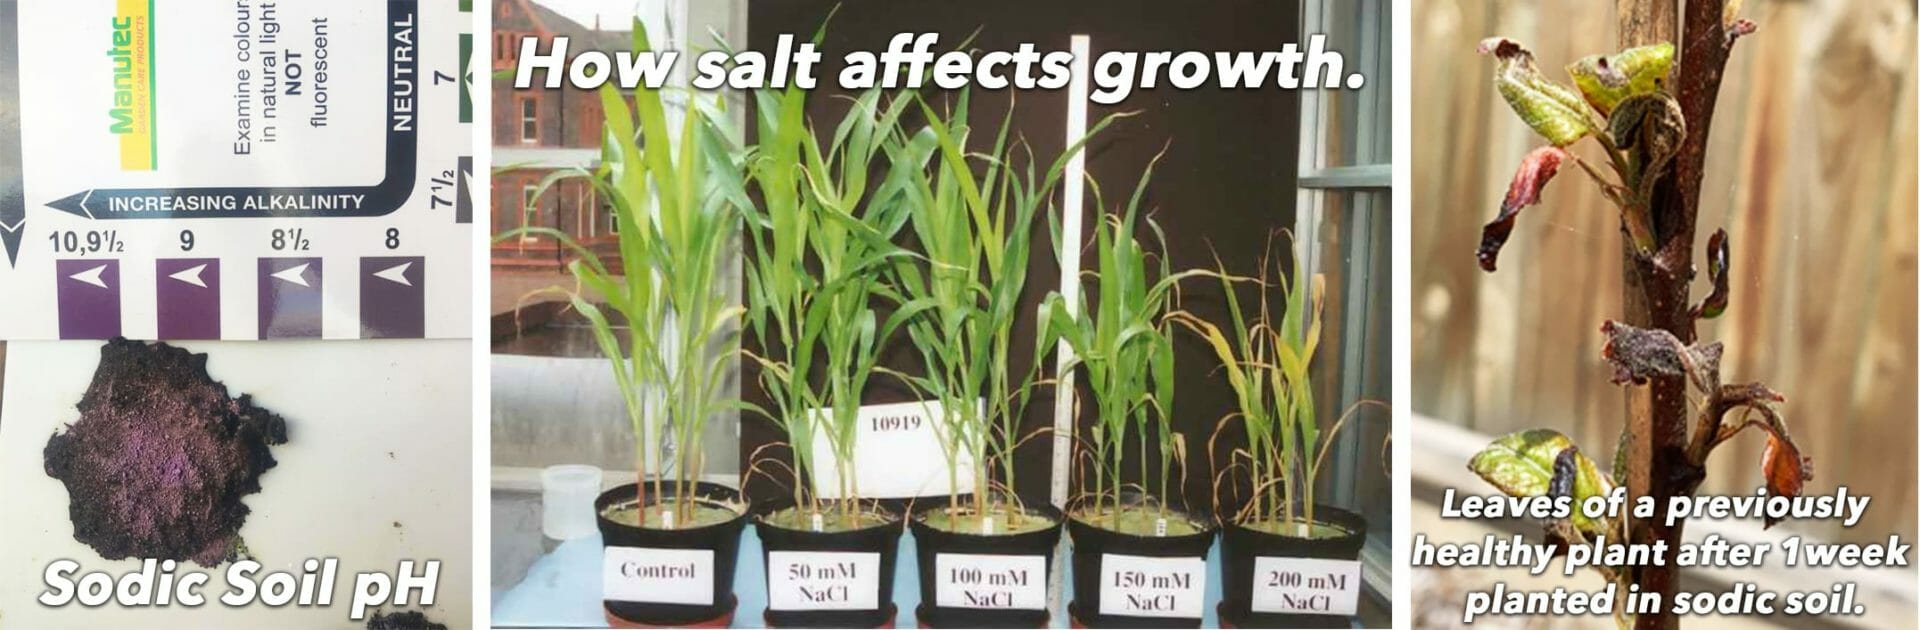
Every suburb has its own unique soil type, temperature range & wind exposure, rainfall, and drainage patterns. Take note of these factors as they will determine the types of plants that will thrive in your garden. If you’re getting a free garden design with Chris, tell him what suburb of Melbourne you live in or even what part, and he’ll tell you the type of soil you’ll have in your garden (experience pays). You can also bring a cup of your soil to your garden design appointment to show Chris, and he’ll explain it to you, telling you what plants will tolerate that soil, or what you need to do to fix your soil.
At your own place, consider where the sun rises and sets, especially if you have a small block with multi-storey buildings nearby. Additionally, if your garden suffers from poor drainage, decide now: am I going to get really involved and invest some work in fixing drainage problems? If not, you’ll need to opt for plants that can tolerate such conditions.
Back to list: 10 Steps to Create Your Dream Garden
Step 4: Get to Know Your ‘Hood
Chris says if he’s ever in a pickle about what will work in a particular garden, he’ll walk the neighbourhood and look
Your neighbourhood is like a real-life gardening science experiment that millions of dollars have already been invested in without you even having to lift a finger. Your neighbours have been trying to create great gardens themselves in the same conditions, and their successes and failures are valuable insights waiting to be discovered. Take a stroll and check out other people’s gardens. Without having to ask (although you can if you’re feeling brave) you’ll be able to see what’s working and what’s not. Look for houses similar to yours and see what plants are thriving. Snap photos of the ones that catch your eye for future inspiration.
Back to list: 10 Steps to Create Your Dream Garden
Step 5: Dream It, Plan It, and Prioritize It

Kim is absolutely stoked with the advanced frangipani we sourced for him, because it was the perfect feature at his brand new property
Now it’s time to get clear on what you want. What’s the big dream for your garden? Low maintenance? Bursting with colours? Ready for that epic backyard BBQ for Hayden’s 21st in six weeks? Something you can actually afford? Identify your top priorities and rank them in order of importance. Low maintenance might sound nice but if street appeal is what you fall asleep thinking about at night, be true to your garden goals. If it’s got to look tip-top for an approaching deadline, like an auction or event, you’ll want to invest in larger, more established plants that won’t look like they were born yesterday to get that instant wow-factor. It’s your garden, so focus on what matters most to you.
Back to list: 10 Steps to Create Your Dream Garden
Step 6: Define Your Garden Style
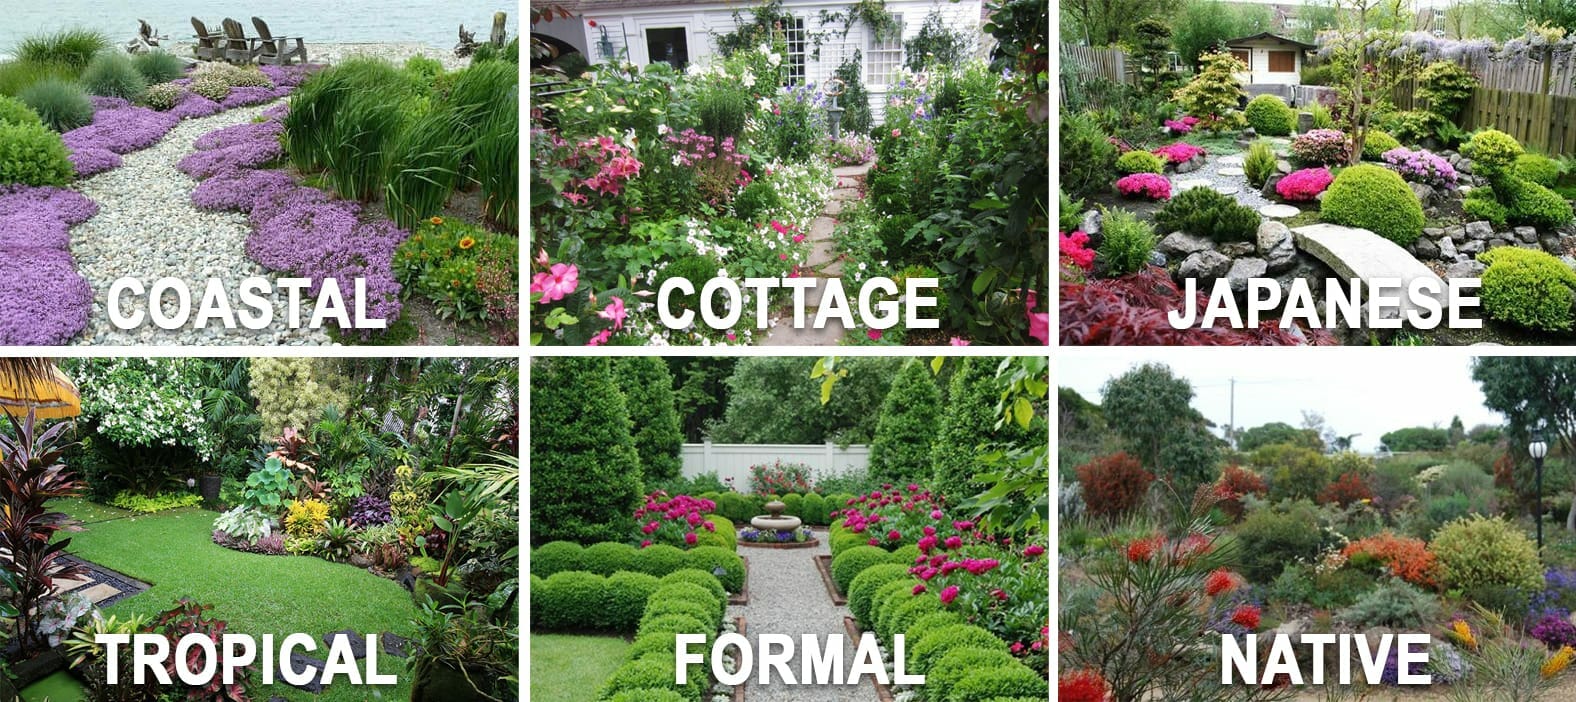
Keeping all of our prior steps in mind, now determine: what’s your garden vibe? Formal and classy or charmingly cottage-like? Choose a style that speaks to your soul, fits your property and sets the tone for your garden. Think about the architecture of your house and what makes you feel all warm and fuzzy inside. This is going to define the range of plants you’re going to work with in the next step.
Back to list: 10 Steps to Create Your Dream Garden
Step 7: Create a Plant Palette That Rocks
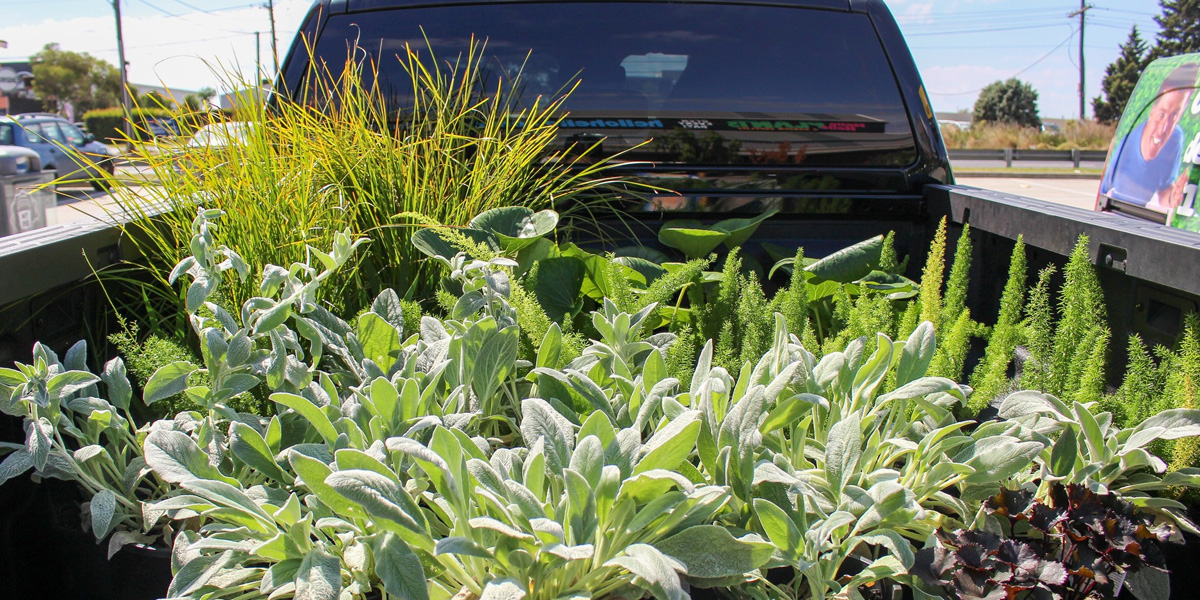
One customer’s ute filled with funky lush modern plants. Clockwise from top left: Lomandra Tanika, Tractor Seat Plant, Asparagus Foxtail Fern, Purple Tractor Seat Plant and Lamb’s Ears
Time to curate a killer collection of plants that’ll make your garden pop. Research plants that can handle your local conditions, the spots you want to put them in, AND that suit your garden style. At this point we have to give a plug for Chris’ free Garden Design service. He is a walking plant encyclopaedia and specialises in taking everything you’ve worked out so far and showing you which plants are going to work in every possible situation. But here’s the golden rule: only pick plants you genuinely love. After all, you’ll be spending lots of quality time with them.
Back to list: 10 Steps to Create Your Dream Garden
Step 8: Plan the Ultimate Plant Placement
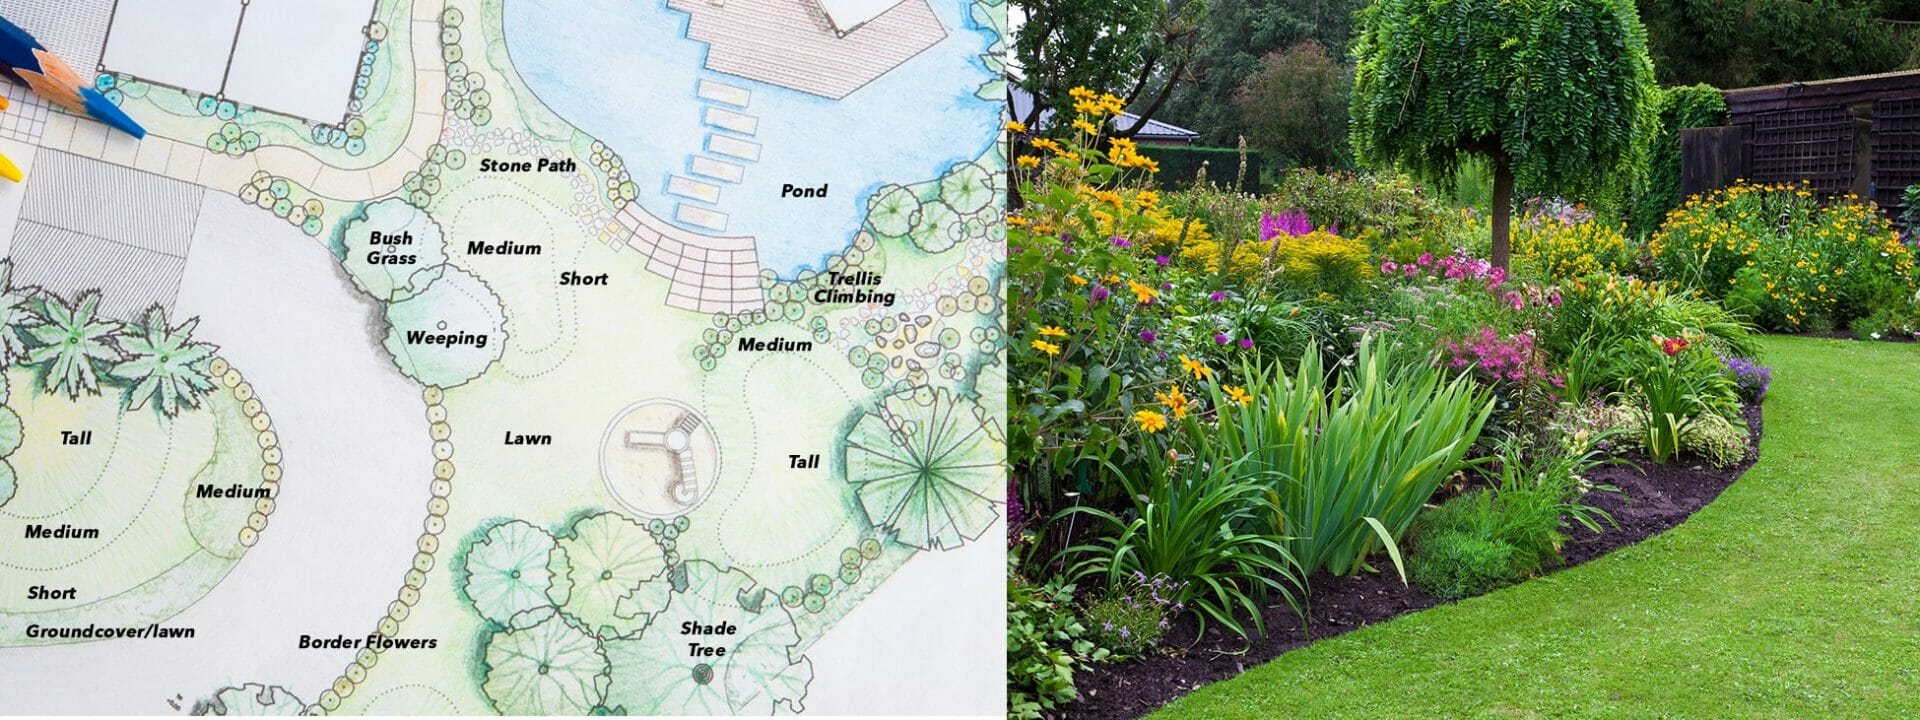
Placement matters, folks! Strategic plant layout is the key to a visually captivating garden. Start by identifying the key features you want to highlight. Got some fancy trees? Use them as focal points and build around them. Add secondary plants to create depth and visual interest. Think big to small, and don’t be afraid to mix it up. You can use subtle patterns and repeat them for a sense of visual rhythm. Let’s be honest, it’s a bit of an art. For an effortless harmonious design, consult a professional like Chris as part of our Garden Design service if needed.
Back to list: 10 Steps to Create Your Dream Garden
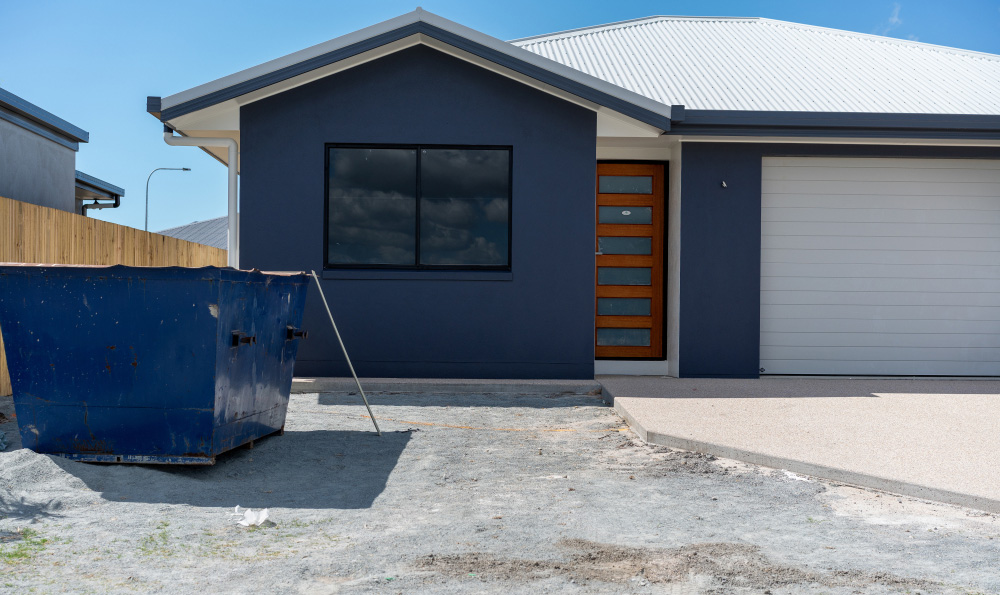
Step 9: Get Down and Dirty with the Prep
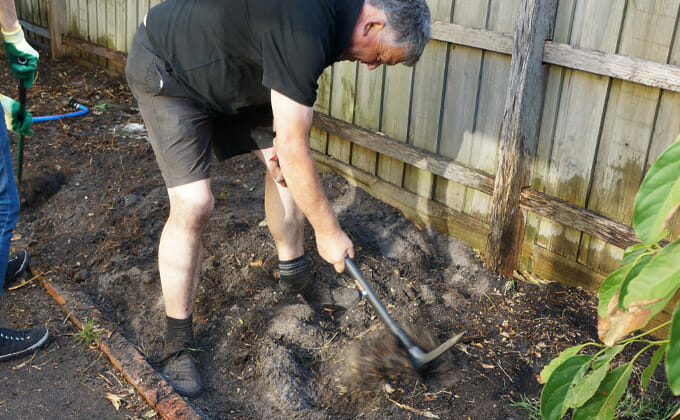
If you’ve got a raw block or a neglected garden, it’s time to roll up those sleeves.
- Begin by spraying the area with Roundup* to zap the weeds, and allow it to sit for 48 hours.
- Mow the grass and weeds down as low as possible, down to the dirt.
- Next, dig, dig, dig! Dig, turn, and break up the soil with a spade or mattock, ensuring you go down to a depth of one whole spade.
- Mix in 5-10cm of organic soil goodness (watch out for dodgy toxic soil sellers) or good quality potting mix and dig this all in again.
- Use a garden fork to roughly go over the area and rake out the junk, weeds, etc.
- And finally, level the area with a steel garden rake before proceeding to create a smooth canvas for your green masterpiece.
Check out Chris’ quick video below on planting into raw dirt or a freshly built block:
*Hold up: Roundup? Controversy alert.
When it comes to battling those pesky garden invaders—aka weeds—there’s one product that often sparks lively debates: Roundup. Now, Roundup has its fair share of controversies, but let’s explore its benefits. You see, Roundup is a herbicide (plant-killer) and contains an active ingredient called Glyphosate, which is like a weed-wrecking ninja. It swiftly eliminates weeds by attacking their roots, ensuring a thorough takedown. The best part? Glyphosate gets neutralized by the calcium naturally present in the soil within a mere 48 hours, rendering it relatively harmless. Of course, safety first! It’s crucial to use proper protection when handling any chemicals. And remember: Roundup does NOT discriminate. It will kill any plant it touches, so don’t get it near your leafy beloveds. If Roundup isn’t your jam, fear not! An alternative approach involves some good ol’ manual labour. Grab your trusty mattock or shovel and hack and smash those weeds and grassy messes into the soil. Then, armed with a garden fork, diligently rake out the weeds, including their sneaky roots, and repeat every week or so in the leadup to planting time. It’s an eco-friendly way to keep your garden weed-free without the need for herbicides.

Chris says: skip the weed mat—it’s a buzzkill for future gardening. Instead, try his favourite technique. Grab yourself a small sharp hoe, and every 2 weeks for the first couple of months after clearing up the area, as weeds emerge but before they get too big, hoe them over and into the soil. The weeds eventually just seem to stop growing: you’ve broken the back of them. It doesn’t matter if this is before or after you’ve done your planting. Keep up this little routine and the pesky weeds are at bay, put a nice thick coating of mulch on.
Back to list: 10 Steps to Create Your Dream Garden
Step 10: Planting 101—You’ve Got This!
When it’s time to plant, don’t stress, we’ve got your back.
- Dig a hole that’s twice as wide and deep as the size of the pot the plant is in.
- If the area has bad drainage, is boggy, has clay or is heavily compacted, sprinkle some soil wetter into the bottom of the hole. This allows water to drain freely away from the base of the plant and prevents the roots from rotting or drowning.
- Mix the soil you dug out of the hole 50/50 with some more good quality organic soil or potting mix, to give your new green buddy a cozy home.
- Back fill the hole with this magic mix so that it’s a little more than half full, enough so that the plant is going to be sitting slightly raised above ground level when you place it in the hole.
- Sprinkle a little Osmocote in the bottom for a nutrient boost, and pop in the plant. Osmocote is specially formulated not to burn the roots of the plant.
- Fill in the sides of the hole with your magic soil mix and mound it up slightly to the trunk/stem of the plant without covering it.
- Sprinkle a little more Osmocote on top near the roots, and gently pat the soil.
- Then remember to mulch around the plants after you’ve done your weed-killing routine for a couple of months, leaving breathing room of about 1-2 inches around the base/main trunk of the plant to avoid rotting.
- Oh, and soil wetter is like a secret weapon for better water penetration and drainage—trust us on this one. Spread around the whole garden bed straight after planting as directed.
Back to list: 10 Steps to Create Your Dream Garden
Bonus step: To Irrigate or Not to Irrigate?

That is the question. Automatic watering sounds like a dream, but it has it’s downsides. If you’ve got a small garden, a trusty proper commercial size hose with a rosette hose head that puts out a decent amount of water, like the ones we advocate, can get the job done. No need to go all fancy with an irrigation system. But hey, if you decide to go for it, Chris suggests you choose visible above-ground sprinklers. Trust us, you’ll thank yourself when you can easily spot which areas are being watered while the system is on, and which might be missing out. With a hidden or in-ground system, you can’t really tell if something’s gone haywire or gotten clogged until plants start dying.
Back to list: 10 Steps to Create Your Dream Garden
Conclusion to all this? Creating your dream garden may feel overwhelming at first, but with these 10 steps, you’re well-equipped to tackle the challenge head-on. By understanding your garden’s assets and liabilities, considering your house’s style, exploring your neighbourhood’s success stories, and nailing down your garden goals, you’ll be on your way to a jaw-dropping outdoor space. If it’s a bit too much to face alone, you can always use our free Garden Design Service to combine your vision with our expert knowledge and years of experience, and get a professional helping hand to create your very own slice of paradise!