Melbourne has various soil types, causing vastly different results in plant growth in the regular suburban and rural garden.
Before you plant, it is best to find out what type of soil you have, so you can adjust the soil to suit your plants, or adjust your plant selection to suit your soil!
Why is my soil type important?
Your soil can dictate what you’re going to be able to plant in your garden. Before any major work is carried out (that includes landscaping AND building too) a soil test is taken. This is to find out the reactivity of your soil, what nutrients already exist in your soil, pH levels, drainage and runoff just to name a few.
If you have poor drainage, for example, plants that suffer in boggy, wet soils would be a poor choice. Plants that require lots of water planted in sandy soils could cause you to have very large water bills due to the increased drainage of sand versus clay or loam.
If you want a comprehensive diagnosis of your soil there are professional soil testing facilities throughout Melbourne, such as Melbourne Soil Testing Services. For the everyday gardener, you can do some very commonly used, basic tests that will tell you enough to get you started.
If you are coming to our Melbourne nursery for a garden design consultation, can also bring us a cup of your soil. One of our experts will let you know what basic type of soil you have, how you can improve it and what you can plant in it that will thrive.
Soil appearance test
You can tell quite a lot just by looking at your soil. So before you get your hands dirty, have a quick squiz at it and look out for these two features.
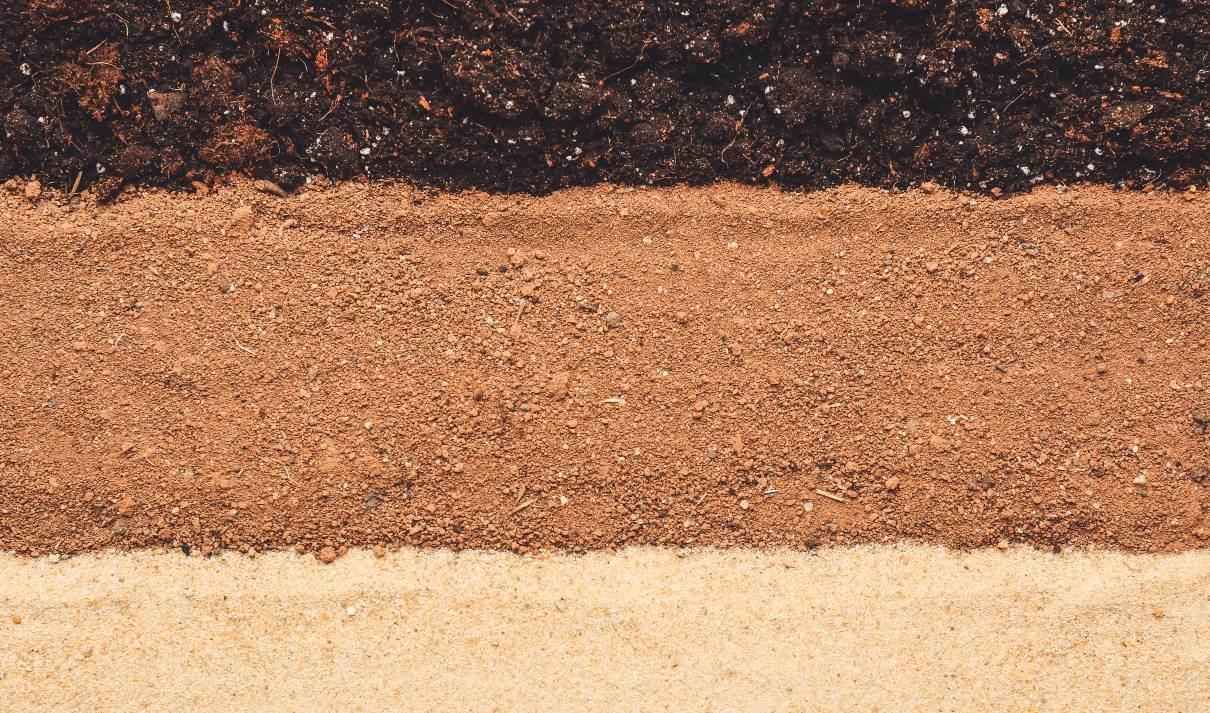
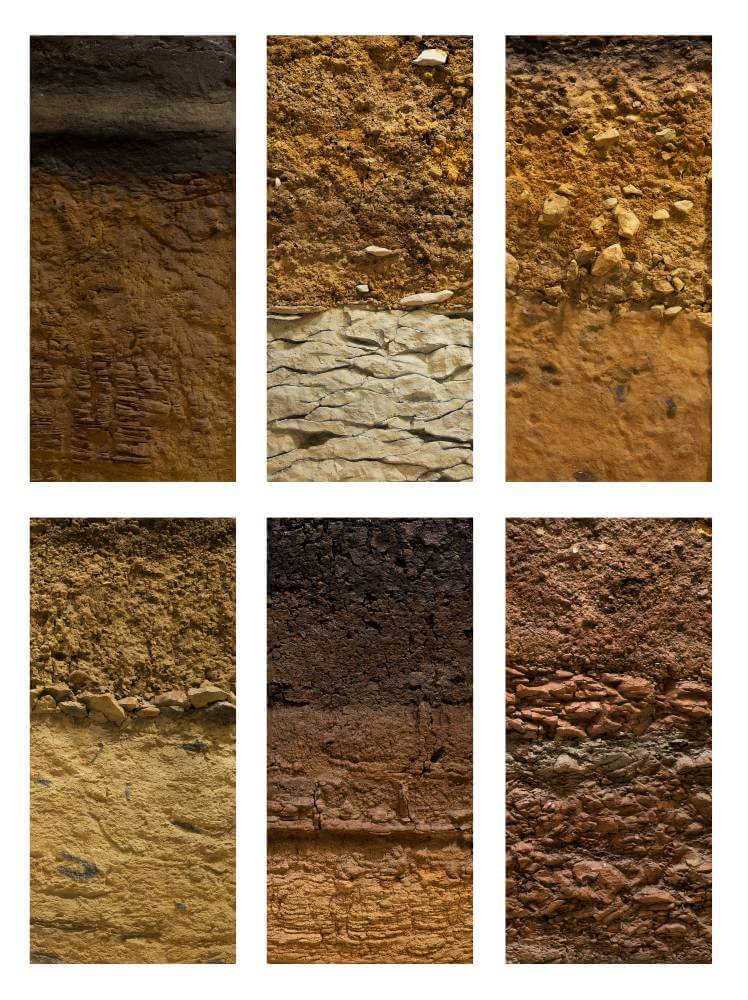
Soil colour
The colour of your soil usually shows what minerals are present in the soil. A dark brown or black soil will usually have high organic matter; rich orange-brown or yellowish-brown soils will be higher in iron.
Brightly coloured soils are also known to drain very well whereas soils with mottled greys, reds and yellows will often be soggy and wet.
Soil Texture
Soil is usually made up of 3 types of particles: clay, silt and sand. Each of these soil components is categorized by their size. The percentages of clay, silt and sand in your soil it will give you the soil texture.
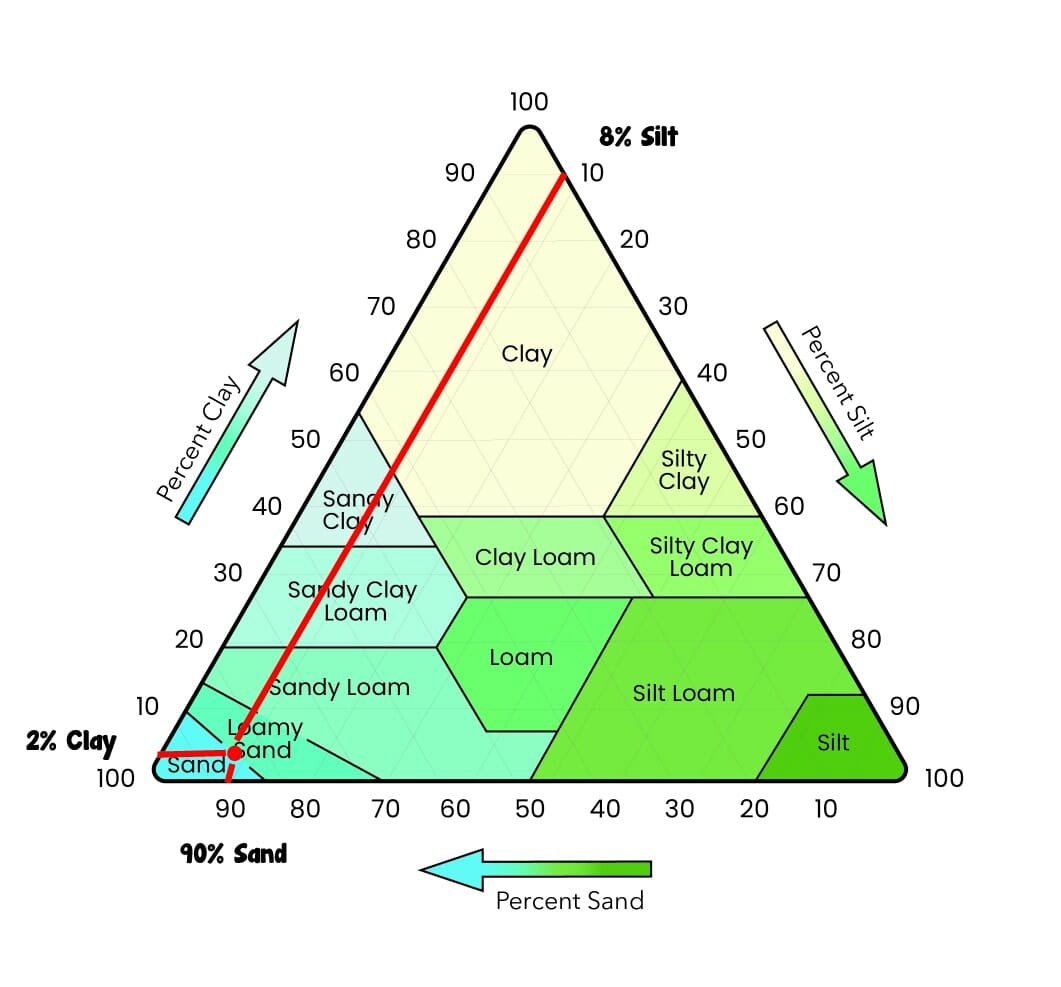
If we’re getting technical, there are 12 standard soil textures with their own names, and each of them refers to a specific combination of the 3 key soil ingredients (clay, silt and sand).
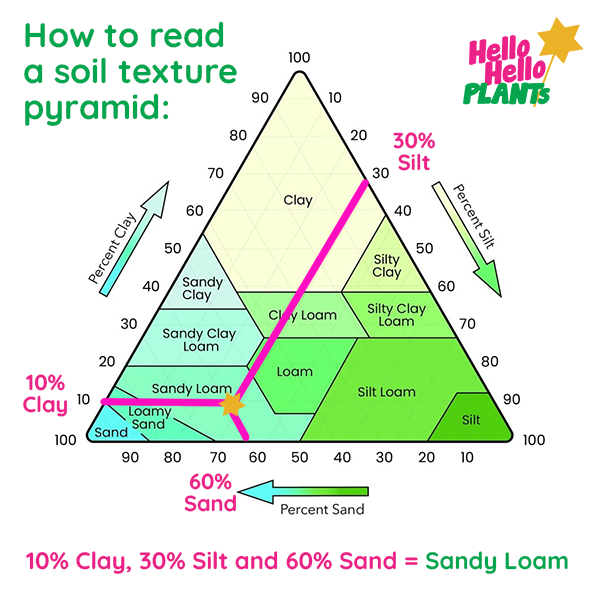
These standard soil textures can be shown on a soil texture triangle or pyramid, which charts the percentage of each of these ingredients. This is useful for growers and gardeners as it shows us what the terms “heavy clay or “loam” mean when describing the soil preferred (or hated) by different types of plants. It also shows us what we need to add to our existing soil in order to bring it closer to ideal growing conditions.
You may have heard the term “sandy loam” many times, as it’s one of the soil textures that many plants enjoy. Using this as an example, the soil texture chart below shows us that “sandy loam” is soil containing any blend within the range of 50-80% sand, 10-50% silt and 10-20% clay.
A chart showing the size difference between the 3 main particle types found in soil: Chunky sand, fine silt and ultra-fine clay
Types of testing for garden soil
Now to get into the real dirt! To find out what type of soil you have, we need to try a few of these basic tests.
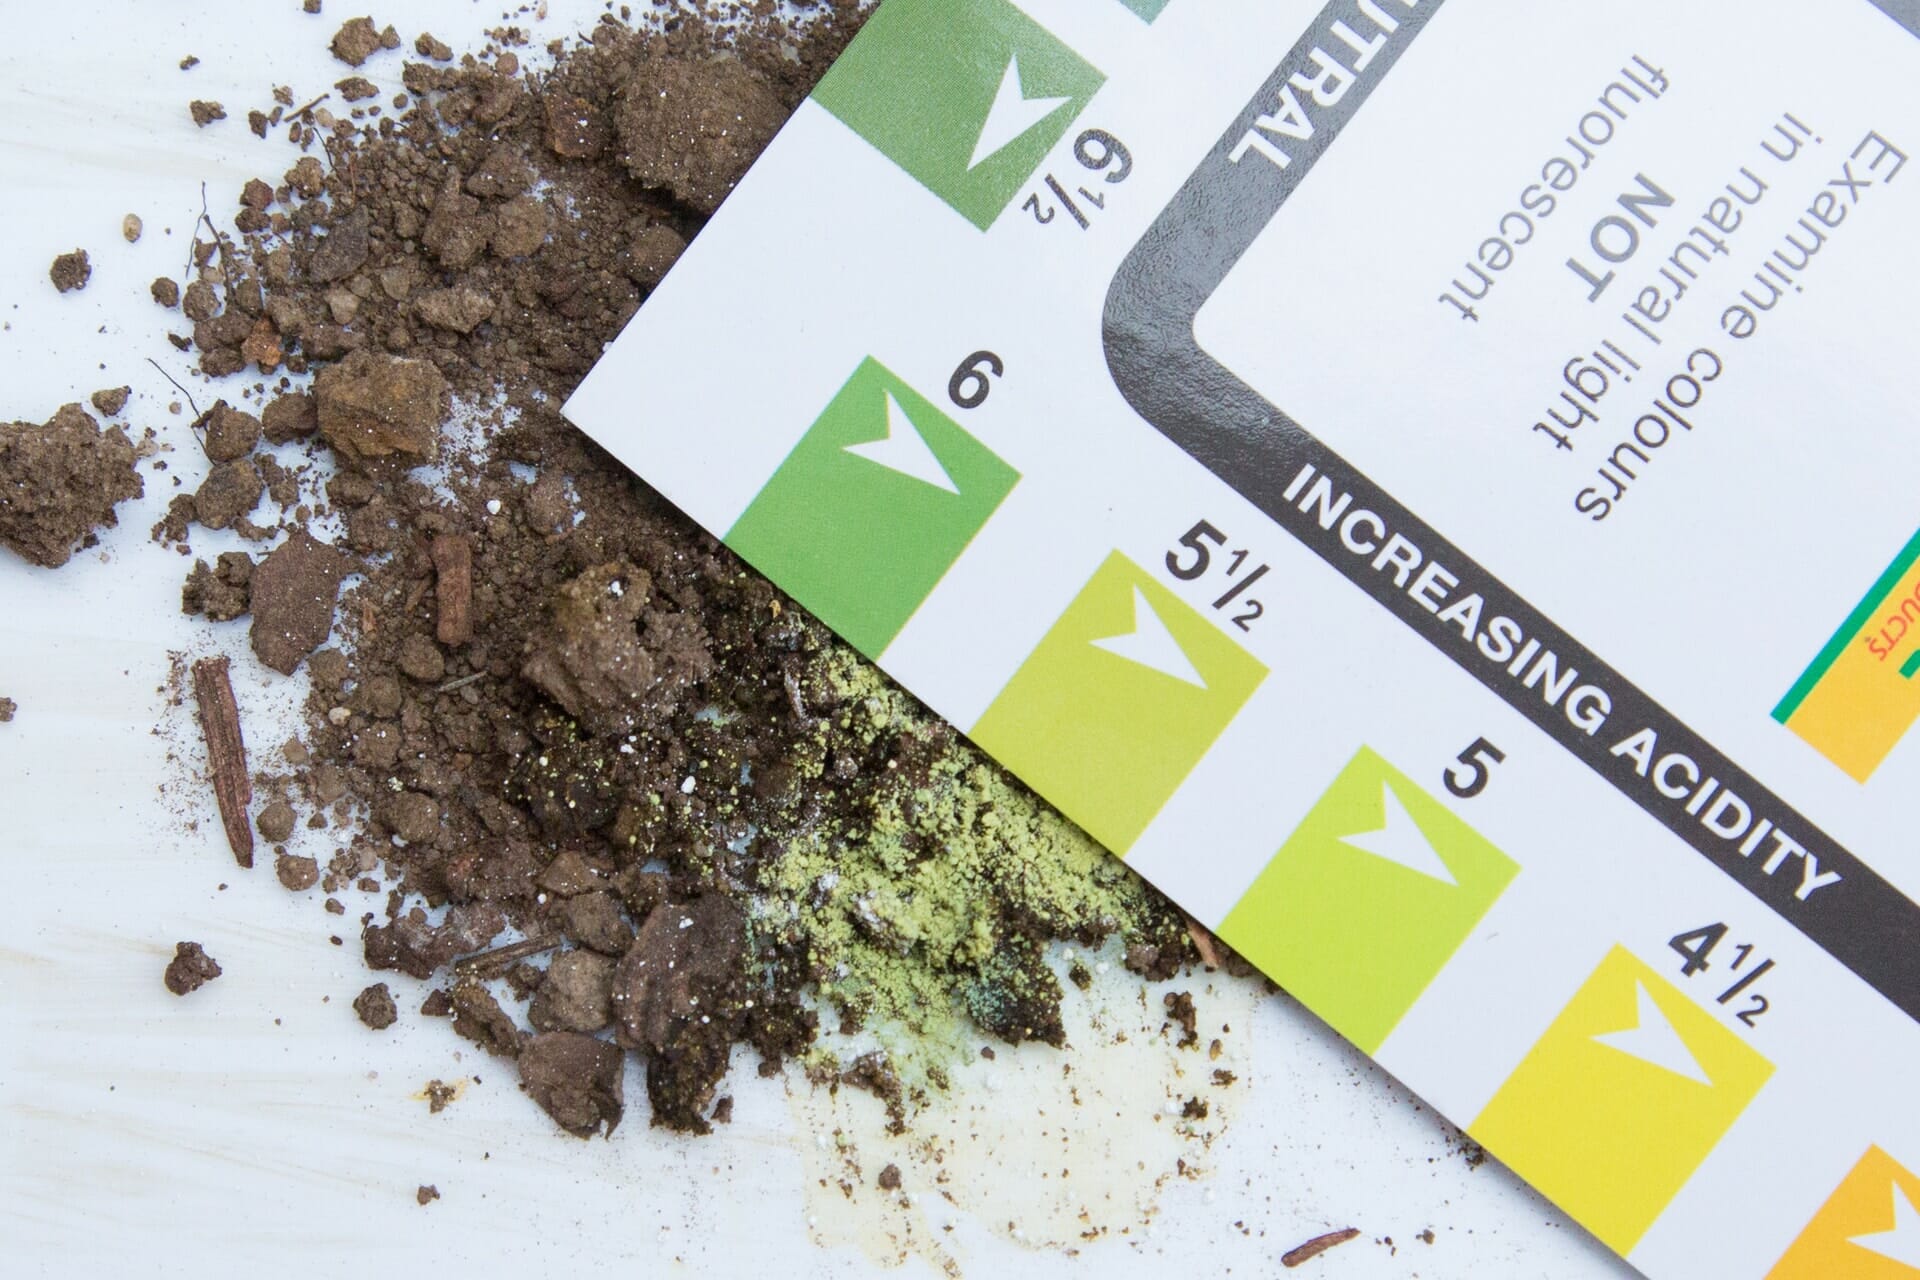
Soil pH test
pH is the level of alkalinity or acidity in your soil. Most plants like a pretty neutral (in the middle) soil pH, some love acid and some like alkaline soil. To learn more about pH and what it means for your soil, click here.
You can purchase a pH testing kit from your local hardware shop or some nurseries. They’re very simple and easy to use. They will give you a good idea of what pH level your soil is at, and whether you need to do anything about it.
pH soil test showing a slightly acidic soil
Soil Ribbon Test
A soil ribbon test is a way of figuring out your soil texture by hand. It’s done by adding water to your soil, shaping it, and seeing what it does. How easily it holds its shape or falls apart can tell you a lot about how much clay or sand is in your soil. You can do this in multiple spots in your garden. Here’s a link to a handy video showing how to do this.
Roll your soil sample between your fingers and try to make a roll of soil
Soil drainage test
Drainage is how quickly water drains away or out of your soil. This can be very important for successfully establishing a garden, knowing what plants will do well in your soil, and how often you will need to water. As “Wet Feet” caused by poor drainage is the number one plant killer in Melbourne, you want to know your drainage situation in case it needs to be remedied.
A soil drainage test is simple:
Dig a hole approximately 30-40cm deep and 15cm wide
Fill with water and time how long it takes to drain
If the water sits in the hole for over an hour with no recognisable reduction, this is poor drainage.
If the water level has dropped a few centimetres after an hour or so, it is moderately well drained.
If it drained straight away, that’s very well drained! Possibly a little too well drained…
Drainage can be adjusted by adding different ingredients to amend (change) your soil, and poor drainage can by fixed by creating drainage channels, raising garden beds or applying soil wetter.
Mudshake or Jar Soil Test
What you will need:
Large jar with a lid (that seals well!)
Soil sample (you will need soil from UNDER the leaf litter and topsoil. Dig a hole in the garden bed and take that soil from the bottom of your soil as your sample, otherwise you’ll get too many leaves and sticks in your sample!)
Water
Steps to do a jar shake soil test
Fill the jar half way up with your soil
Fill the remainder of the jar with water, leaving a 1cm gap of air at the top
Shake very well (for approximately 30 seconds)
Leave, undisturbed, to settle overnight or for a few hours
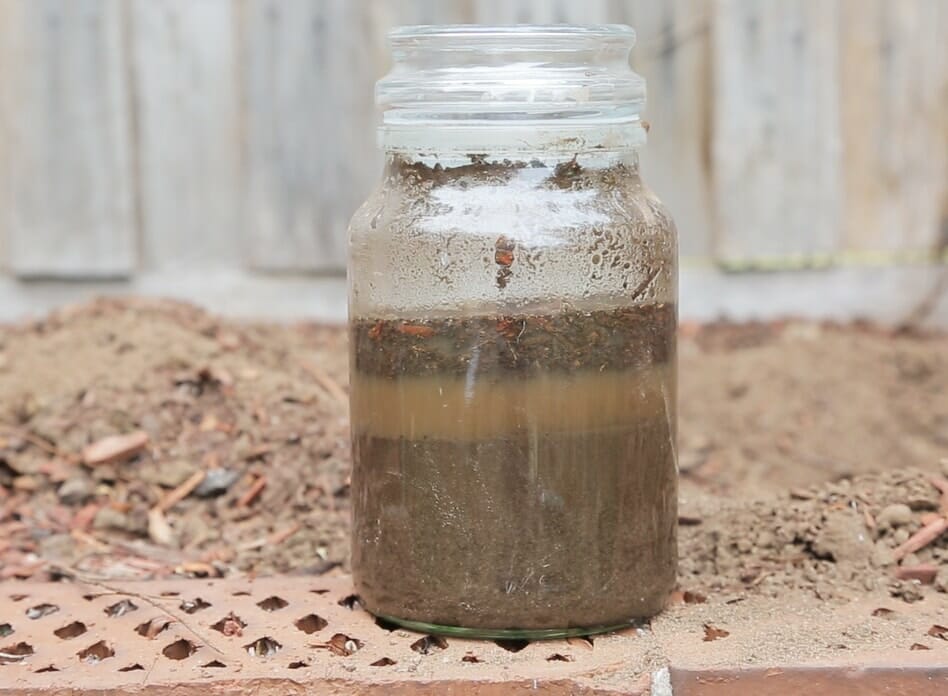
Interpreting a mudshake or jar shake soil test
Once the soil sample has settled, the layers become clearer
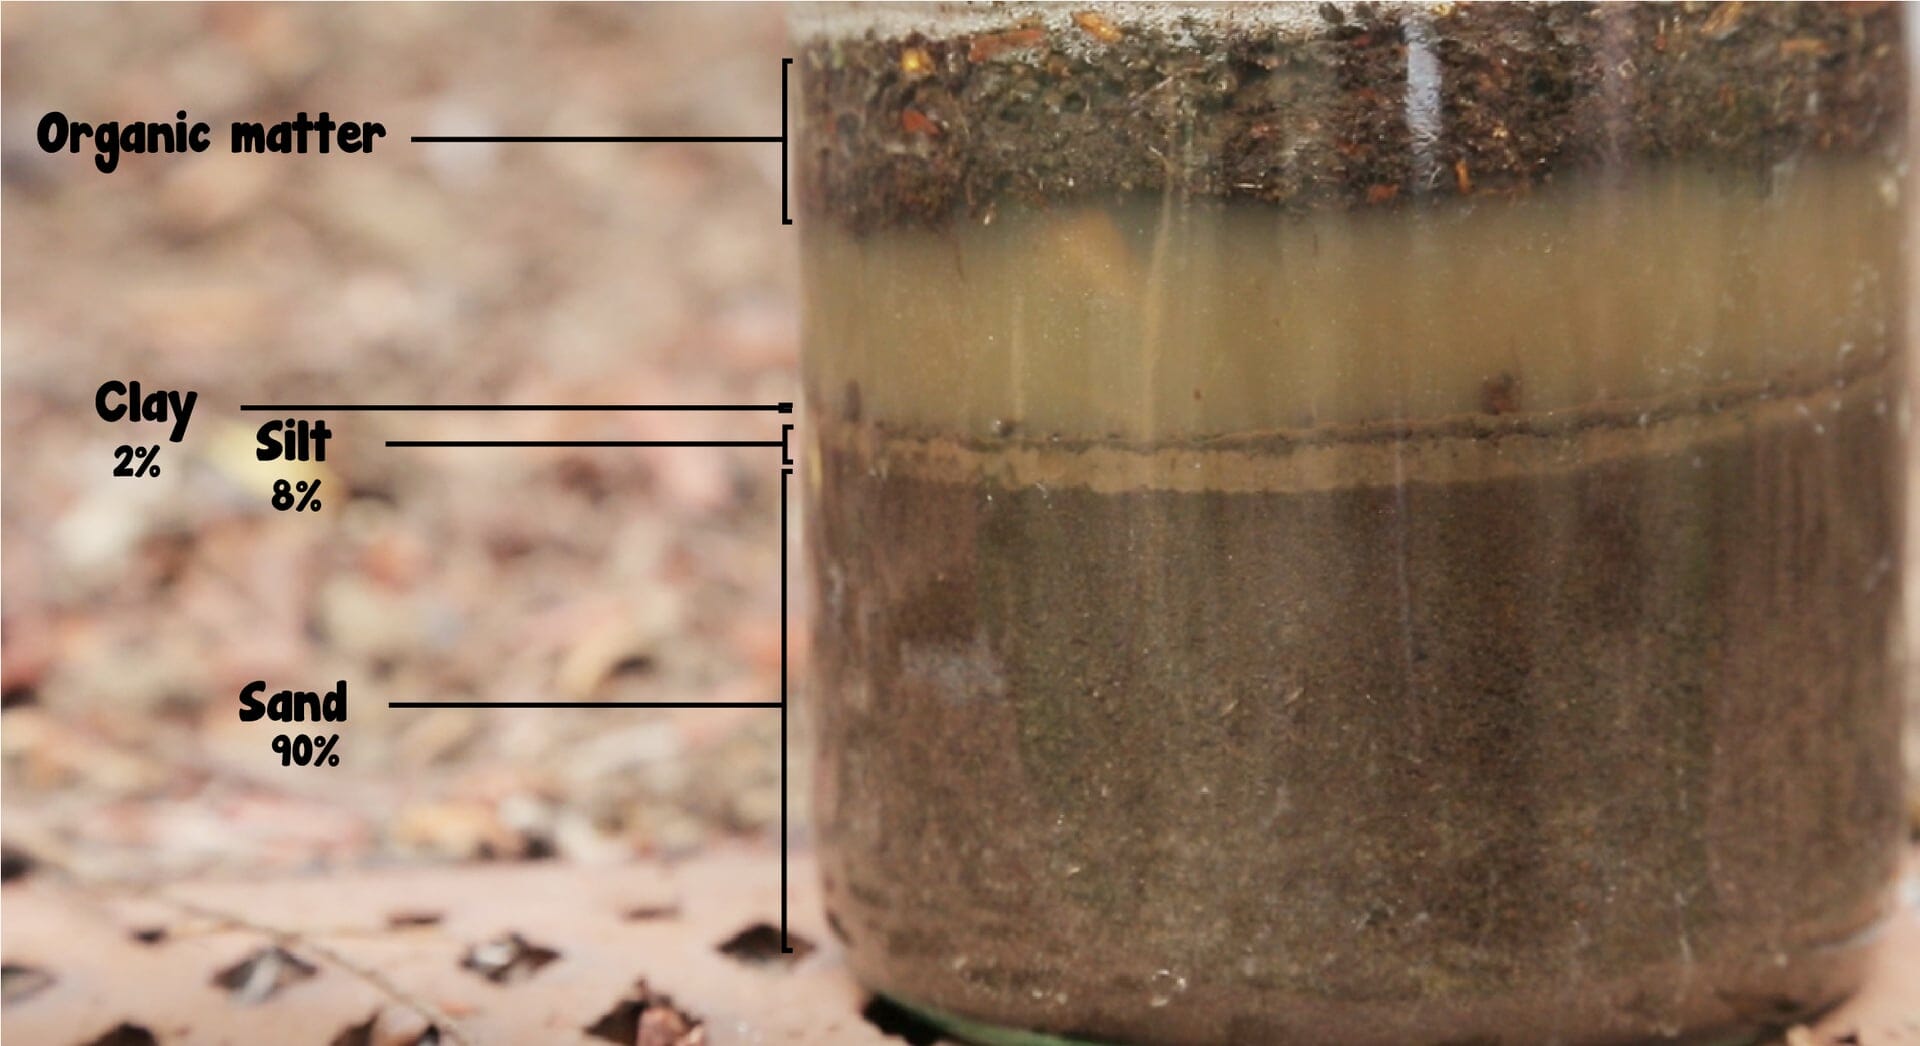
Overnight, the soil sample will settle in different layers, separating the clay, silt and soil (and organic matter if there’s a bit in there).
The sand layer will be at the bottom, then silt in the middle, and finally clay at the top. Lastly any sticks, leaves or large chunks of organic matter will be floating on the surface of the water(hopefully there’s none if it’s well dug soil sample!)
Sometimes it can be difficult to differentiate between the layers because you may have almost no silt in your garden, or almost no sand! So the layer won’t be very thick. If you can, do a few samples to compare and to practice.
Once you have your layers, estimate a percentage for each section. When you have your estimated percentages, compare them to the Soil Textural Triangle below and voilà! You’ll have your soil type!